Thursday, February 2, 2012

2/1-2/12

I went around campus and searched for various types of leaves. Among the species I collected, there was a leaf from an Arizona Ash tree, Lantana, Cilantro, and Chared. The stomata count was different for each leaf varying from 10-20 stomata openings on the top. I also looked at the bottom side and that ranged from 20-60 stomata openings. This is just practice for now but I would say that the stomata on the bottom has much more than the top side.

The process of extracting the stomata of the plants were:

1. Paint clear nail polish on the leaf
2. Let it dry
3. Use a corner of a piece of tape to help peel off the nail polish
4. Tape that piece to a single microscope slide
5. Place a cover slip on top to try to flatten the nail polish out
6. Look under 4x to get it aligned
7. Change to 10x to get a better look
8. Change to 40x to see the openings

02.02.2012

Today all of my equipment for my project came in so I was able to test it on a few lucky subjects =). I ran the test on a good 7 people. I did one test in there relaxed state and another after they run up and down the 3 story staircase. That, I have to admit, was pretty funny seeing the faces when I asked them to run up and down the staircase. The data that I had got from that little test was pretty interesting. For the most part the subjects did worst off there second time (after heart rate increase) but maily only for the first segment. By the time they got to the second segment there heart rate had calmed down dramatically and went back to doing good and sometimes even better, which is something that I hope is not going to be that much of a problem when I do the real thing with caffine to substitute for the running. Although this was a practice run and I did notice a lot of things I need to take into consideration, like if the subject has consumed any caffine in the past couple of hours or so, it was very usful to actually get a feel for how it works and ways the test can come out. So all in all it was a pretty productive day. Oh and sorry if there are some words mispelled, I suck at spelling and there is NO spell check.

Picture-Mania!

On Tuesday, I had a variety of tasks, which I did well getting most of them done before Thursday. I went to check on my petri dishes in the incubator (two are a sample of TSB and Rid-X, and two others are TSB and soil sample from the garden). (Spores were sprouting, smooth texture, opaque). 


Now knowing how to fix and gram stain, the procedure went quicker than my first attempt. 


Looking under the microscope, I found that both were Gram Negative because of their pinkish appearance, and that the bacteria that both of them had (RidX and Soil) was Bacillus.

Afterwards, Josh taught me how to permanently have the sampled bacteria on the slides. I would just need to get my slides ready, get a micro cover slide (22 x 22 mm), and Cytoseal. What I would need to do is apply a dot of Cytoseal without air bubbles, and gently apply the cover slide over it and leave it to undisturbed for 24 hours.


Next, I performed an Oxidase test (for some reason it slants to the side) and if my results came out blue, I would continue with another test.

Results = Blue

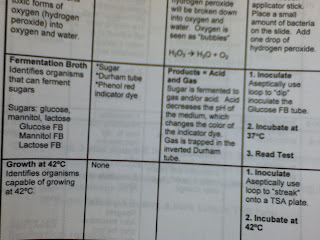
Since the results were blue, I would then need to perform a Fermentation Broth test. I basically needed a lactose, glucose and mannitol FB and add a sample of soil and Rid-X from the petri dishes. After that, I would need to place them in an incubator.


(Lactose, Glucose, and Mannitol) 

Wednesday, February 1, 2012

Wednesday, 2/1

Today I asked Matt for an update on the mycelium's growth. He informed me that he had taken the box out of the tub on Friday afternoon (at the 24 hour mark), then took it home so that he could mist it over the weekend (mister seen in last picture). Matt says he doesn't see any change, but that might be due to the fact he has looked at it everyday since we began the project.

We're only on Day Six and the box says the mushrooms can grow in as little as ten days. I see signs of growth. What do you think?


- Doing some research, I've learned that it can take 2-3 weeks for standard oyster mushroom to reach fruiting stage.

Sunday, January 29, 2012

January 26, 2012

Looking for Bacteria


 (Pictures of TSB + Rid-X bacteria colony)

I originally was supposed to gram stain several of the samples that I streaked on petri dishes, but when I saw the result of the previous streak that I did (TSB + Rid-X), it came out thick and perhaps difficult to gram stain because there was no isolate bacteria colony. I was told to do another streak, but this time with a different method which Matt and Josh demonstrated to me. There are three steps to streak, and this is to better identify the bacteria colony rather than having it all jumbled into one.

Streaking instructions

  • 1) Strike once (horizontal/vertical) 
  • 2) Use a different inoculation loop and streak from the previous streak (about the tip of) to another vertical/horizontal or slanted streak. 
  • 3) Use a different inoculation loop  and repeat step 2. 
With new TSA petri dishes and my sample of TSB and Rid-X, I used the method of streaks. (I was also told for future purposes that when labeling petri dishes, it's best to write at the perimeter of the dish for better viewing instead of the text covering the results). I then placed the two petri dishes in the incubator so I can gram stain them next week. 

I also had my soil + TSB samples from Tuesday and also applied the new streaking technique I learned. I also placed those in the incubator for next week's gram stain. 

First Official Gram Stain
I was eager to learn how to gram stain (seeing as it was the last or close to last step to identify bacteria) and remember how to apply it for future projects. I looked up different ways how to gram stain, but ultimately Josh helped me out and the visual presentation was more helpful than reading off from text. I thought it was going to be very difficult and have many steps (which it did), but it became simple once I got the hang of it. 

Procedures
  • Gather materials (lighter, candle-like object*, clean slides, China marker, Crystal Violet, Distilled water, Gram Iodide, Decoloizer, Safromin, petri dishes with samples, inoculated loops, clothespin) 
  • Make a circle on the center of the slide using the China marker for a target. 
  • Apply about a drop or two of distilled water in the target. 
  • Next, use an inoculated loop to swab the sample from the petri dish (TSB+Rid-X) and add it to the distilled water. 
  • I clipped the slide to the clothespin, and used lighter to light fire on the candle-like object*. 
  • With the fire present, I hovered my slide on top of the fire with a few back and forth movements until the water evaporated. 
  • I removed the fire, and started the staining process. ***By the way, the method is called Fixing before staining. 
Gram Staining
  • With slide, I added a Crystal Violet on the target and waited for 30 seconds. (Was done over sink with gloves) 
  • Next, I washed the slide with Distilled Water for 5 seconds. 
  • I then added Gram Iodide for 60 seconds.
  • I washed the slide with Distilled Water and for 5 seconds.
  • I then added Decolorizer for 1-5 seconds. 
  • I washed the slide with Distilled Water for 1-5 seconds. 
  • I then added Safromin for about 10-20 seconds. 
  • Lastly, I washed it off with Distilled Water. 
Letting the slide dry off, it became maroon-purple like color and was ready to be seen under the microscope. The results were tricky as I saw a combination of Cocci and Bascilus bacteria. This is why I redid the streaking to get a better view of what bacteria is in the Rid-X. I will be doing this next Tuesday for a new sample + Soil and TSB samples.

*I will find out what the object is called. 

Thursday, January 26, 2012

1/26 Mushroom Garden Instructions

Today Matt informed me that he had the materials for the mycelium project and that we would begin. Here's a summary of the procedure on the box...

Step 1 says to place the box indoors and to keep it from direct sunlight.

Step 2 says to open the front panel (it has a perforated rectangle for easy opening) and cut a 3x5 inch "+" (plus sign) into the bag.

Step 3 instructs to mist the box and its contents with water 2x/ day.


And then voilĂ ! (it doesn't say that).
The mushrooms can be harvested in as little as 10 days. The process can be done a second time for a second harvest by repeating the above steps.


~I opened the box only to find more instructions that said to take the bag of soil out of the box and submerge it into a bucket of cold tap water. It took a 1000mL beaker filled to the top with water to hold the bag of soil down, along

Wednesday, January 25, 2012

1/22-23/12

These days I was getting to know and learn about stoma or stomata. I was working on how to look at it and what stomata is. * it's a pore found in the leaf and stem epidermis that is used for gas exchange.*